Install Vinchin Node
Vinchin node is an optional component to Vinchin backup infrastructure, it is used to work with Vinchin server to expand Vinchin backup infrastructure to support backing up large-scale virtual environments. It can be also used for ROBO (Remote Office/Branch Office) data protection scenrios, with a Vinchin backup server deployed in HQ and Vinchin nodes deployment on remote/branch offices to achieve unified data protection with a single web console.
System Requirements
In most cases when a Vinchin node is required, it is recommended to install the node on a physical machine for better performances. The recommended system configurations are as below.
| Hardware | Requirements |
|---|---|
| CPU | 2*Quad-core CPUs or faster |
| RAM | 16GB or more |
| Network | 2*1Gbps ETH or faster |
| OS Disk | 2*120GB SSD |
| OS Disk RAID Level | RAID 1 |
| Data Disk | 1.5 times (or more) capacity of the production data size, if other storage media will be used as backup storage, then backup disk is not required. |
| Data Disk RAID Level | RAID 5 |
| Fibre Channel HBA (optional) | 8Gb Fibre Channel or faster |
Notice
Fibre Channel HBA is optional, only if your backend storage of the virtual infrastructure uses FC SAN, and you wish to run backups through SAN (LAN-free Backup) then you need to equip the physical server with an FC HBA.
Download ISO Image
The ISO image for installing Vinchin node can be downloaded from the below URL.
https://www.vinchin.com/download/node/latest
Prepare Installation Media
Please choose a preferred way from the following options to prepare installation media for Vinchin node installation.
- Install from IPMI remote console
To install Vinchin node from IPMI console, you can directly use the downloaded ISO image file to install without preparing any other type of installation media.
- Install from bootable USB drive
If you wish to install Vinchin node from bootable USB drive, please use the downloaded ISO image file to create a bootable USB drive.
To create a bootable USB drive, prepare an 32GB or larger capacity USB drive, and backup all data of the USB drive before you start to create bootable USB drive with it.
Attach the USB drive to your Windows PC and run UltraISO to create the bootable USB drive with the downloaded ISO file.
- Install from bootable DVD disc
If you wish to install Vinchin node from bootable DVD disc, please use the downloaded ISO file to create a bootable DVD disc with 20GB or larger capacity.
To create a bootable DVD disc, please make sure your PC has a working R/W DVD drive, otherwise, attach a USB DVD drive.
Insert a blank or rewritable DVD disc into the DVD drive, run UltraISO to create the bootable DVD disc with the downloaded ISO file. To guarantee the correctness of the bootable DVD disc, please set the Write Speed to the lowest rate then start burning the DVD disc.
Server Settings
Before you begin to install Vinchin backup node on the physical server, please first make sure that the following preconditions are met.
- RAID configurations had been done
Please refer to System Requirements for recommended RAID configurations.
- RAID volumes had been initialized
If RAID volumes are not initialized, please run a fast initialization for the RAID volumes.
Notice
The server settings are critical, if these preconditions are not met, the installation will fail!
Boot Server from Installation Media
According the bootable media you had prepared for Vinchin server installation, please proceed with the corresponding option from the options below.
- Boot server from Virtual Media of the IPMI console
Here we take Dell PowerEdge server as an example to install from its IPMI console (iDRAC version 9).
Step 1: Open the iDRAC web console and log in.
Step 2: On the Dashboard screen, click on the Virtual Console preview window or click on Start the Virtual Console button to open the virtual console of the server.
Step 3: In the Virtual Console window, click on Virtual Media button, in the Virtual Media dialog click on Connect Virtual Media button, in the Map CD/DVD section, click on Choose File button to select Vinchin backup server ISO file from your local desktop and then click on Map Device. When done, click on Close to end the dialog.
Step 4: In the Virtual Console window, click on Boot button. In the Boot Controls dialog please select Virtual CD/DVD/ISO.
Step 5: In the Confirm Boot Action dialog, click on Yes to confirm.
Step 6: Go back to the iDRAC window and click on the dropdown list button next to the Graceful Shutdown button to show more options, select Reset System(warm boot) to reboot the server.
Step 7: After rebooting, you'll see the Vinchin server installation screen in the server virtual console.
Please refer to Installation Process to complete the installation of Vinchin backup server.
- Boot server from bootable USB drive
Here we take Dell PowerEdge server as an example to install from a bootable USB drive.
Step 1: Plug the bootable USB drive to the server.
Step 2: Turn on the server. If the server is already on, shut it down and turn it on again.
Step 3: As soon as you see the message “F11 = Boot Manager”, please press F11 to enter Boot Manager menu.
Step 4: In the Boot Manager Main Menu, select One-shot BIOS Boot Menu, then select the USB drive as the boot option.
Step 5: When the server boot from the bootable USB drive, please refer to Installation Process to complete the installation.
- Boot server from bootable DVD disc
Here we take Dell PowerEdge server as an example to install from a bootable DVD disc.
Step 1: Insert the bootable DVD disc into the CD/DVD drive. If there’s no CD/DVD drive built into your server, please use an external USB CD/DVD drive and attach it to the server USB interface and then insert the bootable DVD disc to continue.
Step 2: Turn on the server. If the server is already on, shut it down and turn it on again.
Step 3: As soon as you see the message “F11 = Boot Manager”, please press F11 to enter Boot Manager menu.
Step 4: In the Boot Manager Main Menu, select One-shot BIOS Boot Menu, then select the CD/DVD drive as the boot option.
Step 5: When the server boot from the bootable DVD disc, please refer to Installation Process to complete the installation.
Installation Process
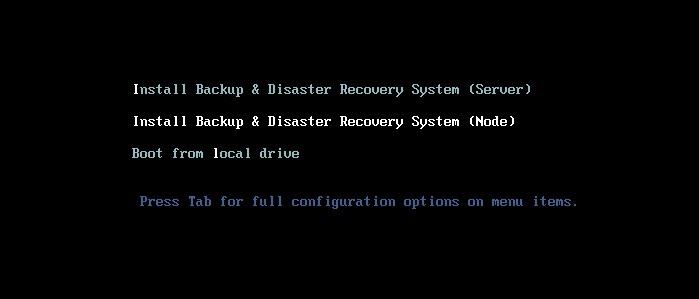
Step 1: Start installation process
By selecting Install Backup & Disaster Recovery System (Node) and press Enter to start the installation process.
Step 2: Select time zone
On the INSTALLATION SUMMARY screen, by selecting Time & Date to configure system time zone.
Select the time zone where you are located in, then click Done to continue to the next step.
Step 3: Select installation destination
By selecting Installation Destination to configure on which disk the system will be installed.
Please only select the disk for operating system installation, the data disk (if any) should be left unselected.
Then select Done to continue.
If the disk contains partitions, select delete the partitions and reclaim the spaces to proceed.
Notice
Reclaim space will erase all data on the selected disk. Please make sure that you had made backup of the data or if the data is no longer useful then to proceed, otherwise please quit installation process.
Step 4: Configure network settings
By selecting Network & Host Name to configure network settings of the backup node.
Select the network interface which you wish to setup its network profile then select Configure....
Select IPv4 Settings, then in the Method dropdown list select Manual.
Select Add to add an IP address for the network interface, a valid netmask and gateway should also be specified. Please make sure that the IP you assigned to the backup node is reachable to the virtual platform and other workloads which you wish to backup.
In the DNS Servers field, input a valid DNS server IP then select Save.
Once the network settings had been configured, switch the network interface from OFF to ON to enable the network interface to auto start up with the node. And in the Host Name field, you can optionally specify a host name for the node and click on Apply.
Once turned the network interface on and configured host name, please select Done to continue.
Step 5: Begin installation
Select Begin Installation to confirm the node installation.
Please wait a while for the installation process to be completed. During the installation process, you DO NOT have to configure CLI user password or create any new user.
When the installation process is completed, you will be requested to reboot the node.
Select Reboot to complete the installation process.
Notice
Vinchin software packages will be installed during the first reboot, please wait patiently for the first reboot to be completed and DO NOT power off or restart the server, otherwise installation of the Vinchin software will fail!
Change CLI user password
After installation, the backup node needs to be restarted. When you see the command line login prompt. Please log in the command line interface using the below default credentials:
Username: backup
Password: Backup@3R
For the security precautions of the backup node, please change the CLI user password at first login by using the below command.
sudo passwd backup
After changing the CLI user password, please keep it safe and do not loss it.
Connect Node to Server
As the Vinchin node does not have a management web console, it should be connected to a Vinchin server for centralized management. There are 2 options for you to connect a Vinchin backup node to backup server.
Option 1: Connect Vinchin backup node to server from Vinchin Backup server web console
To connect a Vinchin backup node to Vinchin backup server, open the backup server web console and go to Resources > Backup Resource > Backup Node page, click on Add to connect a node to server.
In the Master Node IP Address dropdown list, select a network of the backup server to be used to connect to backup node if the backup server has multiple networks.
In the Slave Node IP Address field, input the IP of the backup node which you had configured during the installation process of the backup node, then click on OK.
After a Vinchin node successfully connected to Vinchin server, it will be fully managed by the backup server from now on.
Option 2: Connect Vinchin backup node to server from node CLI (requires restart the backup node)
To connect a Vinchin backup node to Vinchin backup server, login in to the backup node CLI.
Configure the backup node to be connected to the Backup Server with below command:
config_server
Then type in the IP address of the Backup Server upon the prompt "Current server IP is: 0.0.0.0, please input new server IP:" and press Enter.
Upon the prompt "Need to reboot system now [Y/N]?", type Y and then press Enter to reboot.
After rebooting, Vinchin backup node will be connected to the backup server, it will be fully managed by the backup server from now on.