Restore Exchange Objects
To restore Exchange server, please go to Application Backup > M365 Backup > Restore page to create a Exchange server restore job. Please follow the below steps to create the job.
Step 1. Select Restore Point
In the Restore Point dropdown list, select a backup node which stores the desired restore points.
Expand the backup job and choose the backup point you want to restore from. Then, from the restore source list on the right, check the desired timepoint, user, user group, user directory, metadata, etc.
For Exchange server, you need to fill in administrator account and password to finish the authentication.

For Exchange Online, there will be an authentication box, please copy the code, click Please copy the code above and click here to authenticate. Vinchin will open Microsoft 365 Authentication page, paste the code you copied and choose the account that have permissions to authenticate to the Microsoft 365 organization.

After authentication, you can use full-text search and advanced search to find the data you wish to restore based on timepoints. If you select a timepoint from the tree structure on the left, the search scope will be within that timepoint. If you select a user, the search scope will be within the selected user. If you select a directory within a user, the search scope will be within the selected user directory.
For full-text search will search emails, contacts, calendars, events, and jobs all together.
For advanced search allows you to perform more precise searches on a specific type of data individually.

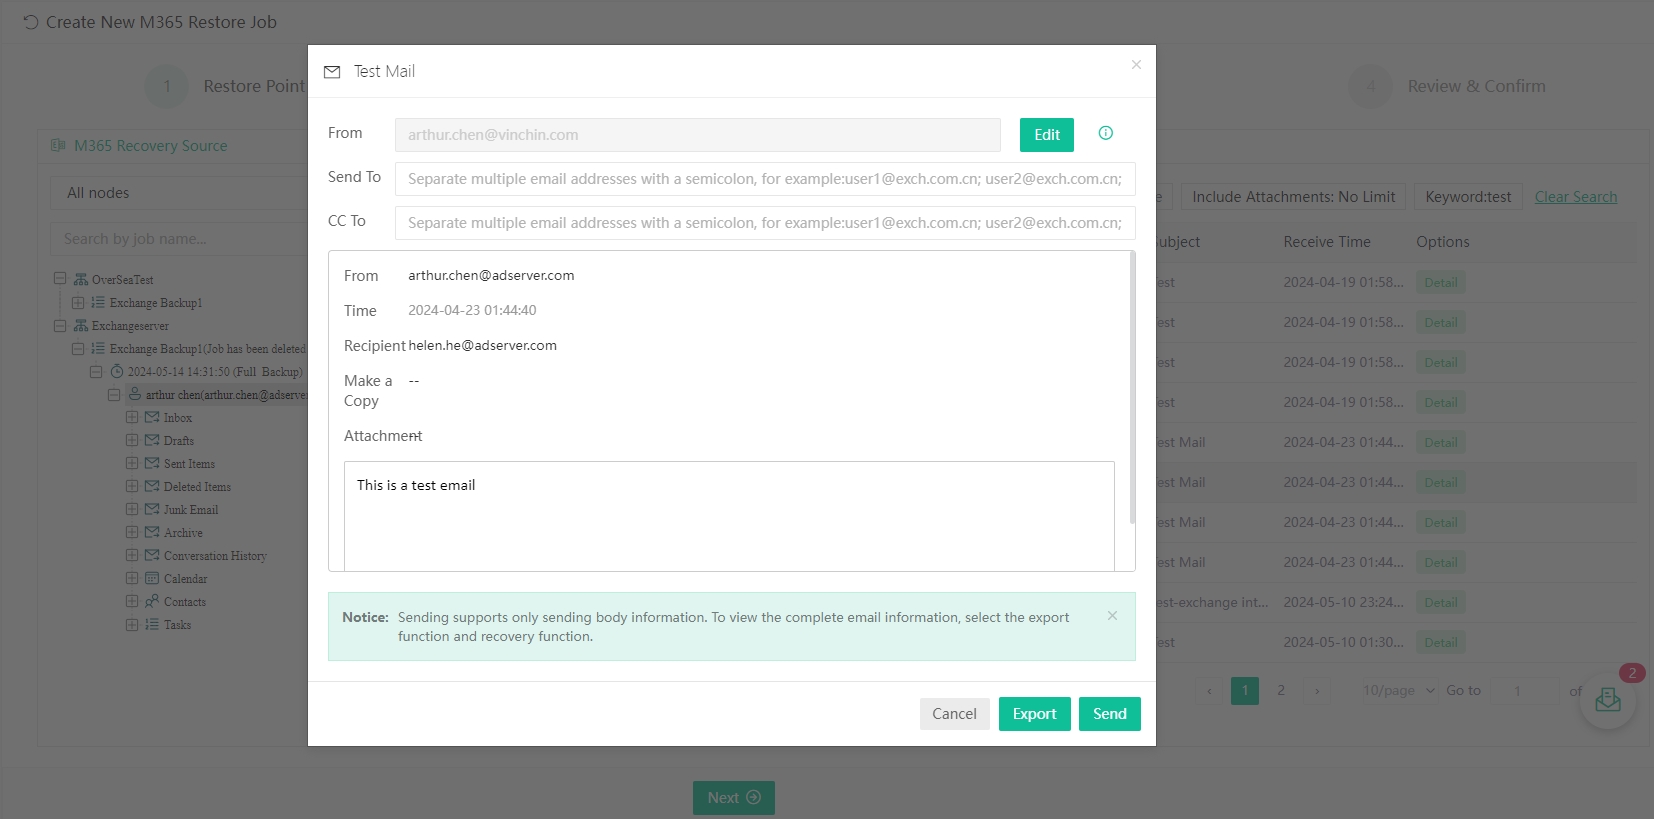
Click the detail button of the metadata to view detailed information about the data. Also could view the selected restore sources by clicking the "Shopping Cart" icon at the bottom right.

Step 2. Select Restore Destination
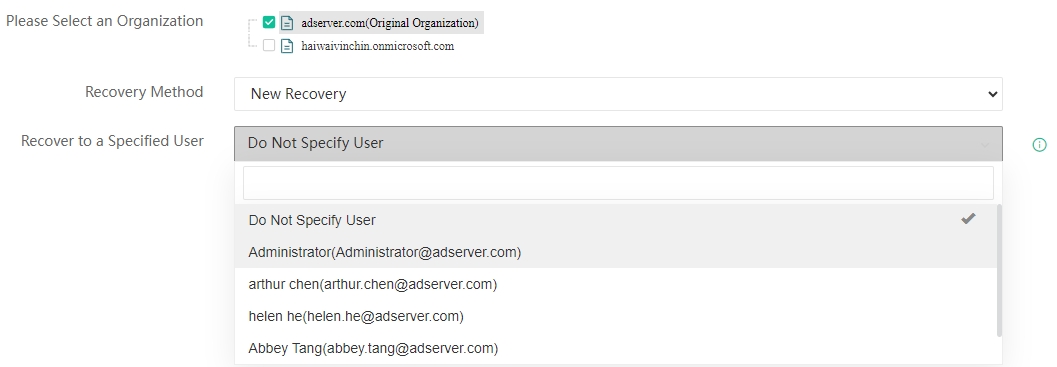
In the Please Select an Organization list, select either the original organization or another organization for the restore. Selecting the original organization allows for an Overwrite Recovery, while selecting another organization only allows for a New Recovery.
If the selected restore point is a single user's data and the restore method is New Recovery, you can specify a user for the restore.

Notice
When the selected organization is exchange server and the target organization does not have the user selected from the restore point, the job will proceed to create a new user. When the selected organization is exchange online and the target organization does not have the user selected from the restore source, the restore for that user will be skipped.
Step 3. Configure Restore Strategy
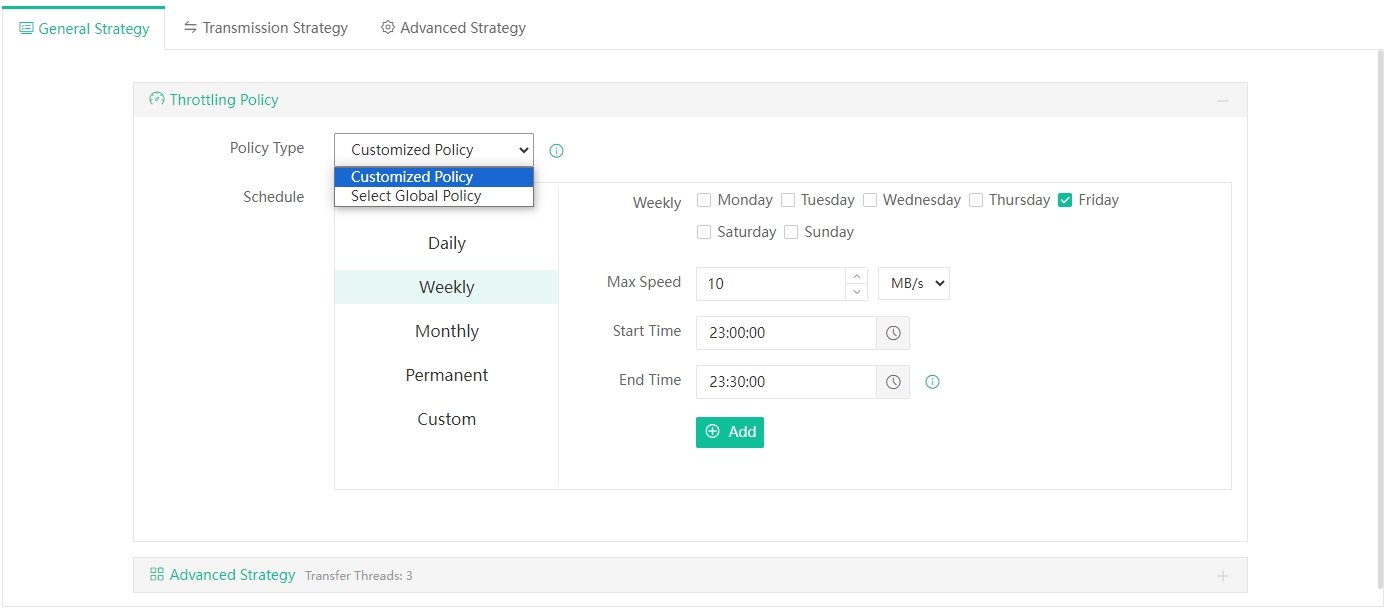
For Throttling Policy, there are two types of throttling Policy: Customized Policy and Global Policy, these settings are optional.
Customized Policy: This policy is only effective for the current job. You can set the throttling to occur daily, weekly, or monthly, and specify the start and end times for the throttling. For permanent throttling, you only need to set the throttling limit.
Global Policy: To use this policy, you must first configure it in Resources > Throttling Policy. This policy can be applied to multiple jobs.

For Transfer Threads, users can configure multithreaded transmission for the restore job.

For Transmission Strategy, users can enable Encrypted Transfer. And backup data is transmitted via RSA encryption algorithms (this configuration is not available for exchange online).
Additionally, by enabling Client Configuration, you can specify a client for the restore job. This allows you to assign different clients within the same organization to perform restores concurrently.
You can configure Retry Attempts and Retry Interval to set Number of network reconnection attempts before giving up and the time interval between each retry attempts (5-60 seconds).

For Advanced Strategy, the setting is optional. You can enable Auto Retry, it will retry the backup of a specific piece of data based on the configured retry interval and retry attempts if the initial backup attempt fails.

Step 4. Review and Confirm Job Settings
After finishing the above settings, you are able to review and confirm all settings here. Click on Submit to confirm creating this job. When the job is created, you will be redirected to the Monitor Center > Jobs page. It will start restoring the data right after the creation of this job.